

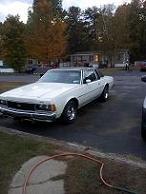
Does anyone know if the floor pans are the same or at least similar enough from 77-96? I've discovered that no one offers replacement pans for these cars (at least not that I can find). However, I've read in a few places that the newer 90s cars share the same pans. There are quite a few later 90s caprices in the yards around here, so it would be nice to just cut the floors out of one of those and graft it in. I really don't want to do flat patch panels because it won't look right.
+2
GM B-Body Forum
solo79
6 posters
Floor Pans

solo79- *Senior Moderator*

- 10th Year Anniversary10 years of being a member on our forum!
- Posts : 458
Join date : 2013-02-06
Location : Kentucky


GM B-Body Forum- Admin

- Helpful and Responsive Member!Very active with responding and helping other members with questions and concerns.10th Year Anniversary10 years of being a member on our forum!
- Posts : 755
Join date : 2013-01-14
Age : 31
Location : Flint/Detroit, MI - Charlotte, NC
From what ive seen and what ive heard, they are the exact same all the way up to 96. I do believe the only difference is if it came factory with dual exhaust (impala ss, 9c1). Because on our stock single exhaust cars the pass side floor pan is raised i believe an inch or two to clear the huge convertor they put on back then so, im not sure if they raised the driver side, or lowered the pass side in the 91-96 models. But either way i still believe they would fit regardless. And that might be your best option, but a ton of work.
solo79- *Senior Moderator*
- 10th Year Anniversary10 years of being a member on our forum!
- Posts : 458
Join date : 2013-02-06
Location : Kentucky
Just an update to this. I finally made it out to the junk yard this past weekend to scout some floor pans. Most all of the cars were rusted as bad if not worse than mine, but I stumbled on a 94 Buick Roadmaster that had nice solid pans. When I pulled the carpet back, I did notice they are in fact not exactly the same. From what I could tell, the shape appears pretty much the same as far as the transmission tunnel and overall appearance, but there are some differences in design in the pans themselves. The lower firewall section around the pedals is completely different and the back seat pans are shaped differently. Also, where the rocker meets the pan is more curved, whereas the 79 is almost squared off. However, I think I can still make it work. I'm going to cut these pans out of this car next Monday hopefully. Hopefully, I can cut the whole pan out, drop it down and slide it out from under the car. They have it up on welded wheel stands pretty high. Once I get the pan, I'll do some comparison photos. I'm going to cut the whole floor out in once piece up to the rockers/firewall/upper back seat. My pan sections at the rockers, firewall, upper back seat and transmission tunnel are good so I'm not messing with replacing the whole floor pan in my car. I'm going to attempt to graph in sections of it and "transition" the sections.
solo79- *Senior Moderator*
- 10th Year Anniversary10 years of being a member on our forum!
- Posts : 458
Join date : 2013-02-06
Location : Kentucky
I am now confirming that the floor pans are in fact pretty much the same. Even the seat mounts are the same. I didn't have a real good view of it the last time, but today after removing the seats and carpet, I can now confirm that other than a few little changes in the back seat area for the seat belts, they are virtually identical. For some reason, when I first looked at the rockers with the carpet and wiring channel in place, it looked more curved, however after removing the carpet and wire channels, it's exactly like the 79. I decided to take the entire floor from part way up the firewall to part way up the back seat and part way up the rockers. I got it half way cut out today. I would have had it all, but the batteries just couldn't take it with my sazall and 4" grinder (all Dewalt). I have 10 batteries and 4 chargers and they couldn't keep up with me.
The reason I'm taking the whole floor is after investigating mine further this morning, I discovered it is rotted out under the seat mounts very badly, so I am now replacing the entire floor in my 79, seat mounts, transmission tunnel and all. I'm hoping to have this thing completely cut out by lunch tomorrow and I'll post pics soon of the comparisons so others can see that if they need pans for their older car, the newer ones will definitely work. Stay tuned...
The reason I'm taking the whole floor is after investigating mine further this morning, I discovered it is rotted out under the seat mounts very badly, so I am now replacing the entire floor in my 79, seat mounts, transmission tunnel and all. I'm hoping to have this thing completely cut out by lunch tomorrow and I'll post pics soon of the comparisons so others can see that if they need pans for their older car, the newer ones will definitely work. Stay tuned...
Myloth- Moderator
- Helpful and Responsive Member!Very active with responding and helping other members with questions and concerns.5th Year AnniversaryCelebrating 5 years of being our member!
- Posts : 638
Join date : 2014-06-09
Location : At the base of the Mountain (NY) Adirondacks
Lol GM has always been too much, seems though they just liked the adage if ain't broke....
Good work though sounds like a PITA I thankfully never had to do a floorpan just patches and a trunk pan.
You seem to have it well in hand though.
Good work though sounds like a PITA I thankfully never had to do a floorpan just patches and a trunk pan.
You seem to have it well in hand though.
solo79- *Senior Moderator*
- 10th Year Anniversary10 years of being a member on our forum!
- Posts : 458
Join date : 2013-02-06
Location : Kentucky
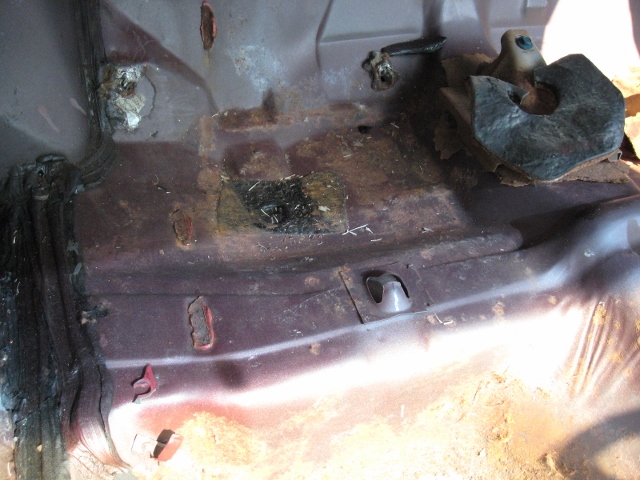
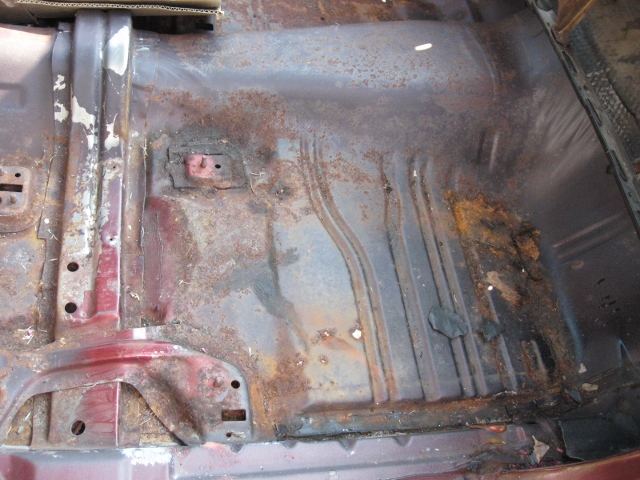
Comparison photos 79 Caprice 2-door floor pan vs. 94 Roadmaster 4-door floor pan:
79 driver's side at firewall area:
94 Roadmaster driver's side at firewall area:

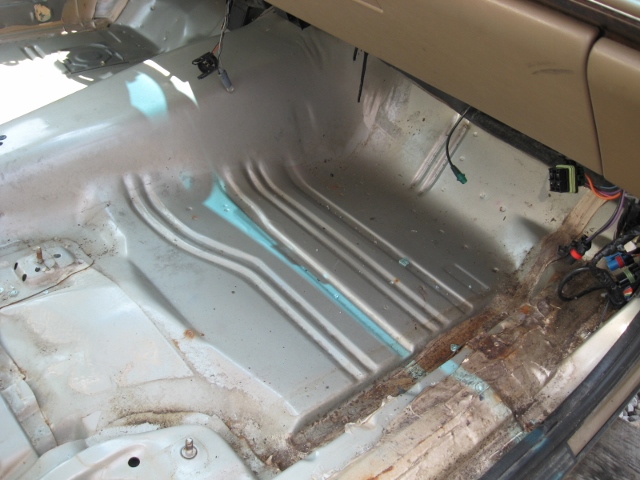
79 driver's front floor board:
94 driver's front floor board:

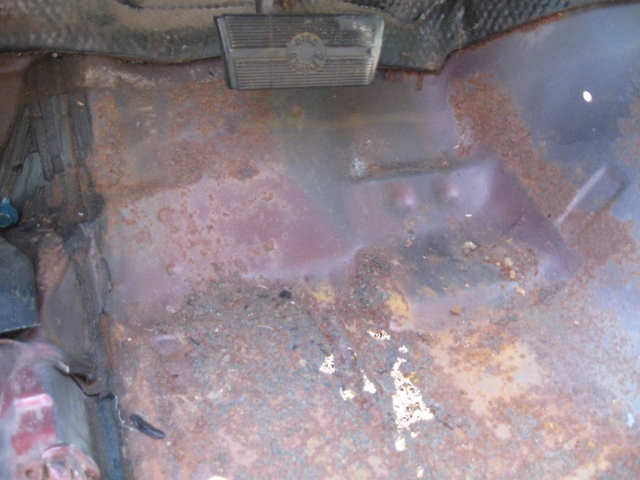
79 passenger front floor board and firewall area:

94 passenger front floor board and firewall area:
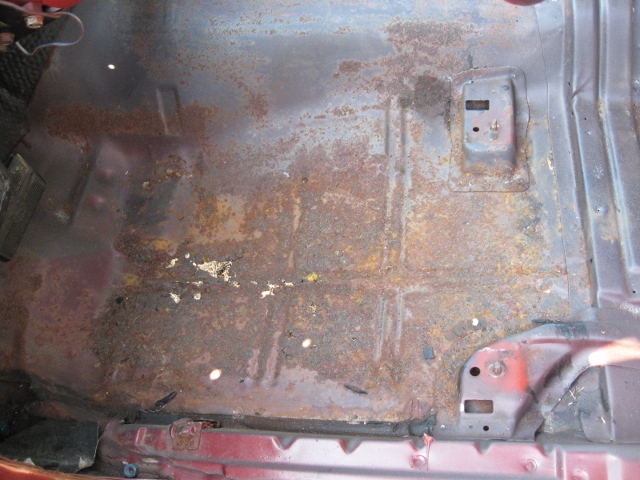
79 Upper rear passenger seat floor:
94 Upper rear passenger seat floor

79 front passenger seat mounting area:
94 front passenger seat mounting area:
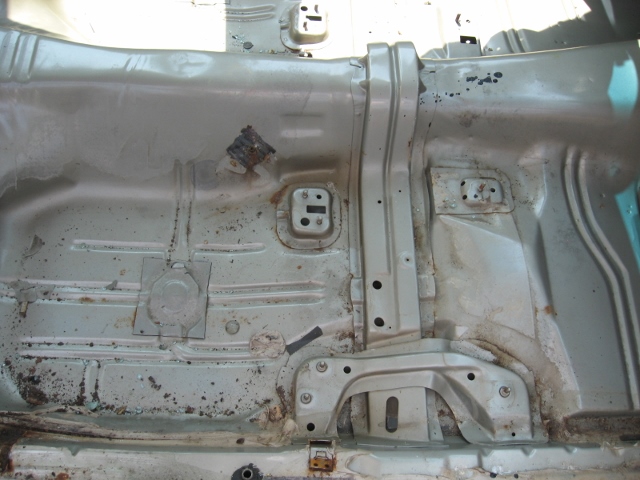
79 Upper rear driver seat floor:

94 Upper rear driver seat floor:

Can you spot some subtle differences? Essentially, the conclusion is: they are interchangeable.
79 driver's side at firewall area:

94 Roadmaster driver's side at firewall area:

79 driver's front floor board:

94 driver's front floor board:

79 passenger front floor board and firewall area:

94 passenger front floor board and firewall area:

79 Upper rear passenger seat floor:

94 Upper rear passenger seat floor

79 front passenger seat mounting area:

94 front passenger seat mounting area:

79 Upper rear driver seat floor:

94 Upper rear driver seat floor:

Can you spot some subtle differences? Essentially, the conclusion is: they are interchangeable.

Sweet Seventy9- *Senior Moderator*
- Helpful and Responsive Member!Very active with responding and helping other members with questions and concerns.10th Year Anniversary10 years of being a member on our forum!
- Posts : 973
Join date : 2013-11-03
Location : Upstate NY
How much loose change did you find under the back seat(s)? 
GM B-Body Forum- Admin
- Helpful and Responsive Member!Very active with responding and helping other members with questions and concerns.10th Year Anniversary10 years of being a member on our forum!
- Posts : 755
Join date : 2013-01-14
Age : 31
Location : Flint/Detroit, MI - Charlotte, NC
GM saved alot of money, i bet they used the same tooling since production began in '76. Theres a few minor differences but nothing major.
solo79- *Senior Moderator*
- 10th Year Anniversary10 years of being a member on our forum!
- Posts : 458
Join date : 2013-02-06
Location : Kentucky
Sweet Seventy9 wrote:How much loose change did you find under the back seat(s)?
Good question. Enough to cover lunch the first day of cutting (around $6.00 worth). I was presented with a few more coins when I got the pan home and stood it on end. They fell out of the seat mount brackets like a slot machine.
Sweet Seventy9- *Senior Moderator*
- Helpful and Responsive Member!Very active with responding and helping other members with questions and concerns.10th Year Anniversary10 years of being a member on our forum!
- Posts : 973
Join date : 2013-11-03
Location : Upstate NY
solo79 wrote:Sweet Seventy9 wrote:How much loose change did you find under the back seat(s)?
Good question. Enough to cover lunch the first day of cutting (around $6.00 worth). I was presented with a few more coins when I got the pan home and stood it on end. They fell out of the seat mount brackets like a slot machine.
Jackpot!!
Wow that's a huge job you've undertaken. It's gonna be well worth it though, you lucky dog!
That's one of the best floor pans I've seen in a while. Up here pretty much all of them have rust in one spot or another.
Damn, that's even better than the one in my old Impala. Good Job finding and saving it before it got crushed!
mylilcaddy- Active Member (Tier 2)
")
- 5th Year AnniversaryCelebrating 5 years of being our member!
- Posts : 15
Join date : 2015-01-19
Location : Western KY
You sure did your homework! Thanks, cause now I get to copy it. Really fine job, I just found a perfect rear floor pan from a 94 Caprice Classic and they look and measure like my 79 Landau. They'll even let me cut them out to make sure it's a fit saving me half the cost from a 79 pan I almost bought full of little holes (mine has one big one on each side, to many winter trips to MI and NY). Thank you very much for the insight.
solo79- *Senior Moderator*
- 10th Year Anniversary10 years of being a member on our forum!
- Posts : 458
Join date : 2013-02-06
Location : Kentucky
mylilcaddy wrote:You sure did your homework! Thanks, cause now I get to copy it. Really fine job, I just found a perfect rear floor pan from a 94 Caprice Classic and they look and measure like my 79 Landau. They'll even let me cut them out to make sure it's a fit saving me half the cost from a 79 pan I almost bought full of little holes (mine has one big one on each side, to many winter trips to MI and NY). Thank you very much for the insight.
No problem! Check this link for pictures of the pan cut out on my build thread, page 8 toward the bottom:
https://www.gmbbodyforum.com/t69p105-79-chevy-caprice-2-door-then-and-now
Be sure and cut out more than you need. If I had it to do over, I would have taken the dash out of the roadmaster and cut the pan above the joint at the firewall, so that I could do a near seamless replacement, but this will do. If you are cutting the whole floor out, cut it above the turn half way up the rockers and as far up behind the pedals as you can go with a saw so that you get some of the car's structure with it. This will allow you to later separate the actual pan from the structure by drilling out countless spot welds and then the new pan will rest on your car's bracing/structure and can be spot welded to it. When mine is complete, one of these days, the only real seam I'll have that will show is at the transmission tunnel which will be hidden by the transmission. From underneath the car down the sides, the seams will look factory. My goal when finished is to not be able to tell the floor has been replaced unless you pull the carpet out.
mylilcaddy- Active Member (Tier 2)
- 5th Year AnniversaryCelebrating 5 years of being our member!
- Posts : 15
Join date : 2015-01-19
Location : Western KY
OK. The idea is to hide as much refab as possible. I'll be cutting half way up around the foot rear pan and up to and around the seat mounts on the new one. Cutting back the old one an inch or two less the seams really won't show from under but up the sides of the floor. With undercoat it should be enough to keep it clean enough and a whole lot stronger. It blows everyones mind that GM was forward thinking enough to have all these cars floors interchange. A fantastic stroke of luck for us having to fix them! Lived in Detroit 15 yrs. and Finger Lakes area NY over 10 so I do know rust. That's why here in the Purchase Area is where I would buy the older 50's - 70's and take them up there to sell. There are a few left overs to work with but not much any more! That's why I'm holding on to this one, it's like riding and driving in a Cadillac.
Gooched78Caprice- Freshman Member (Tier 3)
")
- 5th Year AnniversaryCelebrating 5 years of being our member!
- Posts : 108
Join date : 2014-11-06
Location : Border riding in the 3-6-oh & 5-oh-3 WA/OR
Tools I needed...
A screwdriver for trim, 47 or 50 torx bit for seatbelts, 13mm or 1/2 socket for seats, chalk to help define cutting area, a few hours, safety glasses, skill saw, couple good blades, 3 batteries, and a 1977-1996 b body then in no time you'll have yourself a new pan. (78 caprice used 50 torx and 1/2 socket, 96 caprice 47 torx & 13mm)
Solo had covered this expertly and I noticed as mentioned it was easiest if you can cut them out above the turn, half way up the rockers approx an inch from the bottom of the pan and cut all the way from the back seat up to where is attached at the firewall with minimal impedance.
What I found to work efficiently:
Take a quick look underneath the car before cutting to take notice of any place with extra bracing or supports. I used chalk but just use something to mark those spots to avoid once your actually cutting. I cut from the back seat rocker up to the front and then up along next to the front kick panel. You can see where the seam sealer is still there from when they originally installed them and just make sure your staying outside of the original pans. Then cut across the back seats and up the tunnel with ease. You can decide from there if you want to cut above the factory seam on the firewall for a proper show quality hidden replacement or just cut along the back to replace the cancer you may have noticed.
Final thought:
I would say this is a 90 minute and up to possibly a 3 hour job depending on your experience. I'm fairly a newbie and if I didn't have to fight a blade that broke off in my saw behind the piece that locks the blade in, it would have been just under 2 hours to get the interior out and cut out the pan. After taking my saw apart and luckily getting the piece out that had broken off in it and had it back running I was there 2.5 hours doing the job myself and was much happier than paying the local yard another 150 for them to do it.
If anyone is needing an extra front floor pan in the NW USA. let me know.
Last edited by Gooched78Caprice on Sun Apr 10, 2016 12:36 pm; edited 1 time in total (Reason for editing : add safety glasses to needed...)

|
|
|